Bench Power Supply - DIY Upcycle
I've wanted a decent bench power supply for a few years and had been making do with assorted plug-in units with different voltages for various projects and experiments. I was thinking of buying a workshop supply on AliExpress, but an article in Hackspace magazine warned about cheap units with inadequate or non-existent earth connections to their metal cases, so I shelved that idea.

I was stripping out an old Dell commercial grade desktop and ended up with a nice 180 watt power supply which was a long thin shape as opposed to the standard square ones and I decided to use this as the basis for a DIY workshop power supply.
This provides plenty of current at the 3 main voltages I needed, 3.3v, 5v and 12v. I wanted at least one variable output as well and had in mind a small project I saw in an electronics magazine a few years ago using a modified cheap buck converter, which I'll come back to later.

I wanted to use as many salvaged and recycled parts as possible, but I needed a case and this came from China via eBay along with a few other parts. I would estimate that about 70% of the project was recycled and the cost was under £30.
As the case is metal and it turned out that the front and back panels were screwed into the plastic chassis and therefore insulated, proper earth connections were a paramount concern, to the point that I put in some additional earth links to be on the safe side. Just like cowbell, you can never have enough earth.

The first task was to cut the case for the mains input, cooling fan, power switch, and the various other front panel parts. My metalworking skills are rough to say the least, but I managed to get everything cut out using side-cutting drills and a lot of filing. Hot glue came in handy later to fix everything in place and to insulate some of the low-voltage connections.

I test fitted the power supply board and then bored mounting holes for it to be fixed into the case using metal stand-off pillars.
 |
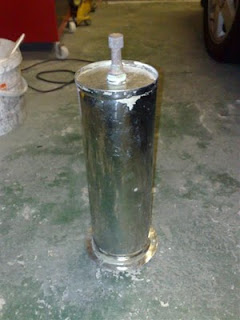
Variable output circuit. Notice the extra (brown) earth connection. |
The variable output was achieved using a cheap up/down buck converter. The 10k preset multi-turn variable resistor was replaced with a 10k multi-turn potentiometer with a nice lockable multi-turn knob. Connecting this to the 12v line gives a range of about 1.5v to 40v at 2amps. Adding a digital combo meter gave a display of the set voltage and the current being drawn.
One thing I needed to work out for this one was a way to switch the output on and off and have an LED showing the output was hot. As the voltage was variable the LED could not be powered off that circuit, but using a double pole switch and wiring the LED to the 12v line going into the buck converter solved that problem.
The 4 LEDs all needed different current-limiting resistors as they were being driven off different voltages.


Comments
Post a Comment