Posts

LED DIY Replacement Lamps

Image
I was given 4 interesting decimal digit displays some years ago which had been part of airfield equipment which was being upgraded. These use 10 tiny 28-volt bulbs for each digit, each illuminating a clear plastic slide etched with the numbers 0-9, a precursor to the 7-segment display. I wanted to upgrade the displays to LED illumination with the possibility of building a retro clock of some sort. The bulbs are a miniature T1-3/4 size which are 5mm, but have a wider flange so a 5mm white LED wouldn't be a direct replacement. 12-volt LEDs are available in the T1-3/4 size, but at about £3 each this would cost me £120 to replace all 40 so that was a nonstarter. After some thought, I hit on this alternative. M5 washers with a 10mm outer diameter, solder the anode to the washer and bend the cathode roughly into the middle. Cheap and works!

Skoda Rapid Heater Re-circulation Motor Repair

Image
In the autumn of 2018 the heater re-circulation motor (I'll refer to this as the HRM from now on) in my 2015 Skoda Rapid decided to fail. It had been making a grinding and clicking noise for a while and I had asked the local Skoda dealer to look into this during a routine service, which they didn't, but more on that later. The problem was that the motor failed in the re-circulate setting so the interior of the car steamed up very quickly and the windscreen couldn't be de-misted. Putting the air-conditioning on was a short-term solution up until the outside temperature dropped below 10 Celsius and that stopped working! There isn't a lot of information online about the Rapid because it is a less common model than other Skodas, but it shares a lot of design with the Fabia and Octavia so it wasn't too hard to get diagrams showing where the motor was and how it works. To get at the HRM I had to remove the glove box (7 Torx screws) and the heater motor (5 Torx screws), ...

Repaired Digital Camera

Image
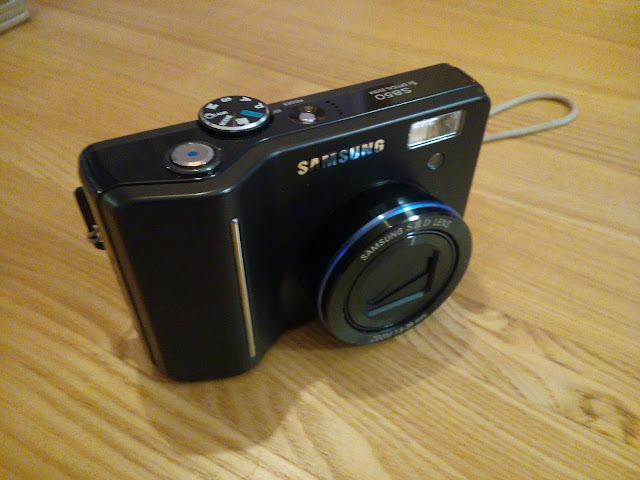
I forgot to photograph this repair while I was doing it and it was a fiddly one too. My wife gave me her old 8 MP Samsung digital camera, modern equivalent of an Instamatic really, but it has a decent zoom lens. The problem was that two batteries had been left in it and contrary to popular belief even Duracell batteries will leak if left long enough (a couple of years). In this case one had corroded the positive spring contact which fell out. Probably some chemical electrolysis reason, but I only have a B at O-level, so not an expert. After carefully dismantling the camera, I was able to solder a small spring to the base of the battery connection which thankfully was still intact (right-hand contact in the bottom photograph). Reassembled the camera and it's working a treat. Just need a glamorous model now to make the repair worthwhile!

ESP8266 WiFi IoT Experiments

Image
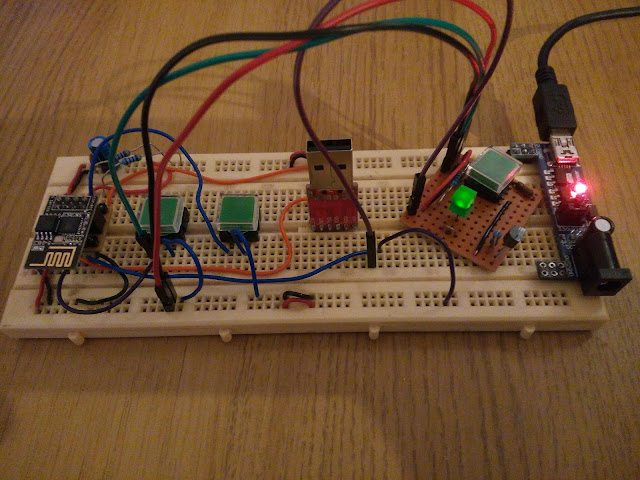
This is experiment number 2 in the world of the Internet of Things and the amazing ESP8266 modules. After developing a basic software on the WeMos D1 ESP board (bottom photo), which is Arduino compatible, I built this test rig for the tiny ESP-01 module. This allows programming via a USB-to-serial module and is powered by a modified 3.3 volt converter (on the right). The software was easily ported across and is now sending temperature data to a Google Sheet via a webhook on the IFTTT service (If This Then That). The ESP-01 only has 2 I/O pins (GPIO), but if serial communication isn't needed that goes up to 4. Using a 2-wire I2C bus seems to be the way to go to add displays, sensors and keypads. The only problem was that the Arduino ESP libraries on my workshop PC seem to be different to my other PC and causing compile errors. Might need to do a clean reinstall. ESP-01 Test Rig WeMos D1 Board

Home Brew Digital Assistant 2

Image
Stand and speaker box glued to the back of the tablet with strong epoxy. Always worth curing the glue by leaving the work on a radiator for a few hours. The speaker box was recovered from an old Apple iMac and gives a better quality sound compared to the tiny speaker which was originally in the tablet.

Home Brew Digital Assistant 1

Image
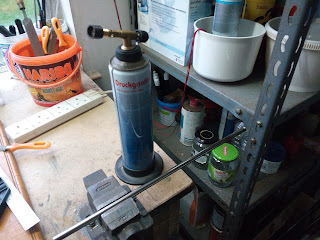
This is phase 1 of turning an old Android tablet into a (sort of) digital assistant. The tablet is another Freegle donation which had failed because the battery had died which in turn was interfering with the power circuit. I removed the battery so the tablet just runs off a 5-volt power supply. I want the unit to have a fixed stand and decided to have a go at bending a piece of light perspex. A bit of old Internet research suggested that a hot bending bar would work. One of the bars I rescued from a dead printer was pressed into service along with my blowtorch. Plenty of heat and a bit of bending worked pretty well. Next step is to glue the stand to the back of the tablet, glue the speaker enclosure to the back of the stand and spray the whole thing, probably gloss white.

Solar Light Upgrade

Image
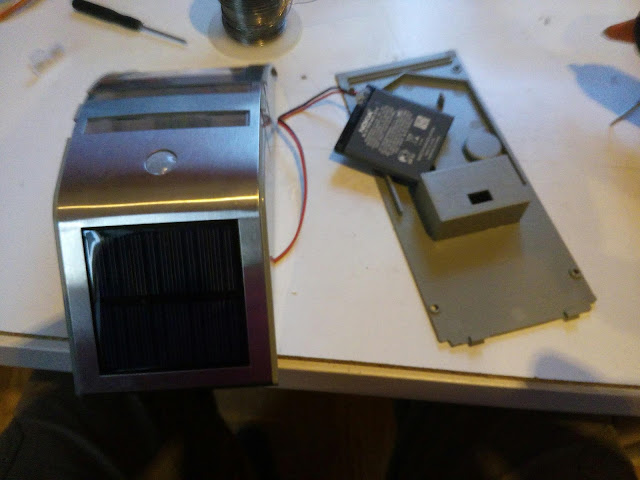
I bought one of these solar security lights from Home Bargains and it failed after one night so I took it back for a replacement and the new one did the same thing. Bad batch I thought, so I had to take a look inside. Turned out the lithium-ion battery was duff and holding no charge. It was an AA-sized 3.7 volt battery with no marked capacity so a hunt in the parts bins was called for and this root around turned up a new Nokia 'phone battery in the same 3.7 voltage and 950mAh capacity. A bit of soldering and hot glue wizardry and the light is working as it should.